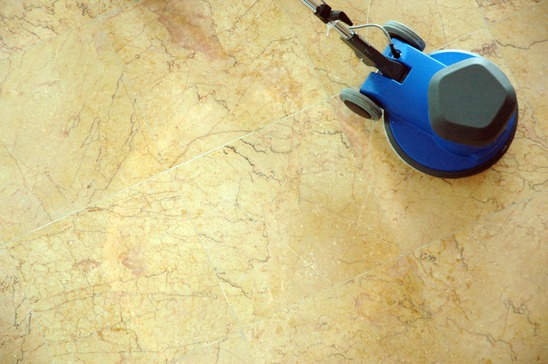
Over time, as you continue the feat of making your floors shine, wax builds up and creates a yellow tint on your floors. It is essential that you first remove all the old, yellow wax underlayers from the floors before coating with a new layer of wax. Applying a new coating of wax to the floors without removing any old wax will only contribute to the yellowing of the floors in the future.
Removing wax from the floors.
When you are removing the old wax from the floors, you must be very careful! Some of the supplies you need contain harmful chemicals that can negatively affect your health, and the floor you are trying to clean and protect. To ensure your safety in this process it is important that you wear protective gear such as gloves, and a mask to avoid getting sick.
Process of Elimination.
Remember: There are a variety of floor waxing options for different types of flooring (wood, vinyl, ceramic and more). It is especially important when removing old wax that you DO NOT ASSUME that all floors use the same waxing methods.
If you are having trouble with removing the leftover wax on your floors at home or you want to re-wax the floors for a new shine you can follow this simple method, or you can call Steamatic for professional help restoring and renewing your floors.
 Steaming Your Home to Cleanliness
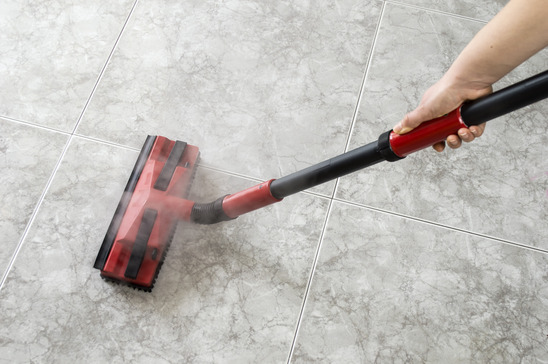
Steam cleaners heat water to a boiling point of 212 degrees Fahrenheit or 100 degrees Celsius at sea level. Once the water reaches its boiling point, it turns into steam. The steam then continues to heat and is forced through a nozzle which allows for the killing of bacteria, mold, and other contaminants that have made their way into your home over time.
Carpets and Upholstery. Steam penetrates the fibers in carpets, drapes, upholstery, stuffed animals, pillows and more. Typically 240 degrees is the temperature used to kill dust mites, their eggs and other allergens within your household. It is recommended that steam cleaning the bedding, carpets and other fibers is performed at least once a month.
Kitchen and Bathroom. It is more common to find traces of mold, and mildew in places such as the bathroom and kitchen. Therefore, steam cleaning these rooms is especially important and can even save you money and energy in the long run. Steam that is heated to 240 degrees Fahrenheit will typically be hot enough to kill and even remove mold, mildew and fungus from tiles, and bathroom doors. Bacteria found on the kitchen counters, and sinks are also destroyed by steam cleaning once it reaches the correct temperature.
Hardwood Floors. Hardwood is very difficult to keep clean and extremely expensive to replace if not steamed properly. Typically, we suggest that people steam their hardwood floors to ensure that the dust and bacteria is removed but also to ensure the floor does not get warped in the process costing you more money in the long run.
Steam cleaning reduces the chances that mold and mildew will begin growing after cleaning. 10-15 minutes after being cleaned carpets and rugs are safe to use again.
If you are seeking a way to clean and sanitize your home without using harmful chemicals or bleach, Steamatic has steam cleaning services that are quick, harmless and cost-effective. Our vans are always fully stocked with the necessary steam tools to have your home good as new in no time!
 Exterior Brick Cleaning; Stop Mold In Its’ Tracks
What you will need
When cleaning the mold off of your bricks it is important to possess the proper equipment for the job but also to keep yourself clean and away from sickening contaminants. For this job you will need; goggles, rubber gloves, a firm broom, bucket with bleach and water and a hose and nozzle for rinsing.
Here are the steps you can follow at home:
If you clean the mold or moss off of your brick walls and you still notice traces of black in the holes of the brick, use more bleach and water, repeat the process and let it sit for a longer period of time. If you have completed this process a few times to no avail, contact Steamatic at
1 888-767-7616
What to look out for during the cleaning process:
When you are working on removing mold from your brick walls it is important that you take the proper precautions. Damages such as the brick color fading can occur if you use a power washer on the face of the brick. Sometimes, when attempting to remove mold from the bricks of your home you will find a white film like material, this is called efflorescence which is caused by excessive moisture endured by the bricks over time.
Taking the time to clean your bricks and working to avoid mold growth, is a great way to ensure the safety and well-being of members in your household. As time goes on and mold builds up it becomes more difficult to remove.
Often times, it takes the work of professionals such as ourselves at Steamatic to complete this brick cleaning process for you in the most cost-effective way possible!
 Improving the Workspace With Clean Lighting
By allowing the lights in your office to build up grime, dust and other contaminants will ultimately cost you more money in the long run. Not to mention, dust and grime build-ups in your lighting causes colds, allergies, and other health risks that could negatively affect you and your employees in the same work environment.
Employees who are working all day need clean lighting to perform to their full potential. In offices and other work environments with poor lighting, employees typically suffer from low productivity levels that could be prevented by having the lights cleaned on a more frequent basis.
At Steamatic we recommend that the first big cleaning of your lights is done by professionals. All the years of grime and dust build-up on the lights will take professional equipment to get a good, thorough clean.
Professional cleaners have to follow a plan when cleaning lights. One thing to keep in mind is that protective gear is always to be worn when cleaning lights, this will help to avoid getting sick from dust and other contaminants.
Employees respond most positively and productively to a clean, brightly-lit workspace. If you are working in a kitchen or type of workshop, it is important to clean your lighting to ensure the safety of the worker, as their job can leave them prone to physical injuries.
Cleaning and maintaining lighting and diffusers is important whether you are dealing with a home or work environment.
Choose Steamatic for cleaning your spaces lights! We are affordable, experienced, and a industry-leading company with the determination to have your lights cleaned thoroughly.
 Steamatic’s Top-4 Carpet Stains (and How to Clean Them Up!)
Some stains are easily taken care of with basic home cleaning methods, while others require either gallons of elbow grease, or a professional touch from the Steamatic professionals. If you find stumble across a particularly stubborn stain, your best bet is to get in touch with our professional carpet cleaning services. The alternative can be expensive when you consider the cost of proper cleaning tools and chemicals, and is very labour-intensive. Worst of all, amateur attempts to tackle tough stains can actually damage your carpet and drive the stain deeper into the fibers.
If you want to avoid tearing out your carpet and your hair, you should consult Steamatic’s list of 4 common and catastrophic carpet stains. Depending on your unique circumstances, you can decide if you want to try our DIY cleaning suggestions, or call in the pros.
Red Wine
Red wine is often celebrated for its heart-healthy qualities, but you may have a heart attack if you spot this deep-red liquid pouring onto your home’s pristine plush. Unfortunately, red wine spills are quite common. This is a beverage usually enjoyed when it is time to unwind, or time to party. In either case, you are trying to relax, and your inhibitions drop down, making you much more likely to fumble a glass accidentally.
When you are forced to treat a red wine stain, the first thing you should do is blot the fresh spill. Next, wet a clean cloth with either plain water, or a mixture of one tablespoon distilled white vinegar and hand dishwashing liquid in two cups of warm water. Some people recommend hydrogen peroxide for red wine attacks, but these pieces of advice are responsible for bleach-scarred carpets across Canada. If you feel the stain is bad enough that you are considering bleach, call 1-88-767-7616
Pet Stains
Is there anything worse for the tidy homeowner than seeing their fluffy source of unconditional love squat down and drop a stinky stain onto their prized carpet?
Fortunately, fresh pet stains are usually fairly easy to get rid of. Remove the dropping, soak the area, wash it thoroughly, and consider spraying down an enzymatic cleaner. These are available at most pet stores. Pet leaks can be taken care of with the classic newspaper soak treatment, before a thorough wash is done. Try to use a cleanser that will neutralize any traces of your pet odour, or your living room could turn into a territorial war zone between pets looking to mark their spots.
Blood
Obviously, the first thing you need to attend to is your wound. If it is bad enough to bleed, you need to clean and wrap your cut properly. Once that urgent matter is finished, the next is to tackle your carpet. This cleaning attempt is going to be time-sensitive, so sometimes it is worthwhile to call in your roommate or significant other to start the cleaning process before things get worse. Wet blood is fairly easy to clean, whereas dried blood is a nightmare that requires professional help.
To remove wet blood, dab at the stain with a solution made with one tablespoon hand dishwashing liquid and two cups o cold water. Once you are done, dab at the liquid with a clean and dry cloth. Repeat this process until the blood is gone. This is another common stain that people recommend bleaching treatments to clean, but avoid this whenever possible.
Bleach
Remember all of our warnings against using bleach? This is why. Bleach is perhaps one of the worst stains your carpet can receive.
Bleach stains are extremely time-sensitive. The faster you can tackle this stain, the better your chances of coming away with a clean carpet. Make sure you protect yourself with some safety gloves, then soak up the bleach stain with a sacrifical (but clean) cloth. Use the dishwashing liquid and water solution recommended earlier to dab at the affected area from the outside-in.
Good luck with this one – it won’t be easy, and you may need to consider some strategic furniture placement options to hide the inevitable fading damage.
To avoid bleach mishaps, leave the stubborn stains to us – call 1-888-767-7616 today to learn more about how we can save your carpet from certain doom!
 The Basics and Benefits of Dry Ice Blast Cleaning
Industrial and residential clients alike have been wowed by the environmental and practical perks of our dry ice blast cleaning method. Those unfamiliar with this technique should read on for a brief primer and overview of the many different benefits this service provides.
What is dry ice blast cleaning, exactly?
Dry ice blasting is a relatively new innovation being advanced by the Steamatic team. We are always seeking out the best new cleaning techniques, and both research and field tests have supported our decision to back this new cleaning technology.
Dry ice blast cleaning involves directing a mildly abrasive stream of solid CO2 pellets towards old paint, rust, mold, or any other mess requiring rapid, electronically-sensitive, and eco-friendly removal. Pellets are made when liquid carbon dioxide is taken from a pressurized storage tank and expanded at ambient pressure to create snow. The next step in the process involved compressing this snow through a die to make hard pellets. When blasted out of our special equipment, these dry ice pellets convert instantly from solid to vapor on impact in a process known as “sublimation,” which strips the surface of its contaminants and vanishes without a trace.
Dry ice blasting is becoming favoured by clients looking to minimize their environmental impact. With awareness of our unsustainable global paradigm spreading rapidly, many industries are now operating under stringent environmental regulations in hopes of reversing the damage being done to our planet. Dry ice blasting fits perfectly into this approach, offering rapid cleaning that requires little to no production downtime, while also leaving no waste or residue behind.
How does dry ice blast cleaning work?
The idea of blasting away contaminants with a jet of dry ice sounds impressive, but how does it really work?
Step 1 – The transfer of energy
CO2 pellets are shot from our blasting gun at supersonic speed. They impact the target surface and transfer their energy into the paint, rust, or mold that is being cleaned away. This transfer of energy kicks the contaminant off of the target surface without any risk of damage or abrasion.
Step 2 – Micro-thermal shock sets in
Dry ice pellets are extremely cold at about -110 degrees Fahrenheit. When these freezing pellets make contact with the target surface, this sudden temperature drop causes a micro-thermal shock which occurs between the surface contaminant and the substrate. This causes the contaminant to crack, delaminate, and otherwise crumble away for safe and easy clean-up
Step 3 – Sublimation
The final phase of the dry ice blast cleaning process has to do with gas pressure, as the pellets explode on impact, converting instantly to a gas. This conversion to a harmless CO2 gas forces the contaminant off of the surface so that it can be easily cleaned up.
The benefits of dry ice blast cleaning over its alternatives
Some of the alternatives used previously in place of dry ice blast cleaning include abrasive glass, sand, and walnut shell blasting, as well as traditional steam cleaning. Though valuable in their own right, these methods pale in comparison to dry ice blast cleaning for many jobs.
If you would like to learn more about our innovative dry ice blast cleaning process, visit our website today. Our professional cleaners are on duty 24/7 and can help you with any cleaning request!
 Battle of the Blast Cleaners: Dry Ice Versus Older Methods
Some consumers feel that this industry move towards innovative technology is not a good thing. Newer is not always better they say, and in some cases, they are right. Sophisticated cars with complex digital consoles leave more room for error. Powerful new mobile devices have so many apps and add-ons that battery life is shorter than ever.
In the cleaning industry, this same trend has been taking hold. In an effort to stay ahead of the curve and take advantage of the latest cleaning breakthroughs, Steamatic has incorporated new dry ice blast cleaning technologies into their full cleaning service suite. Some more conservative companies and consumers have not yet been convinced of the value of this new innovation – newer is not always better, after all, and the idea of washing away mold, graffiti, paint, and rust with a jetvstream of ice pellets seems like something Elron Hubbard might write about.
To those who are still unconvinced about the value of Steamatic’s dry ice blast cleaning service, read on for a head-to-head comparison with conventional solvent cleaning, steam blasting, and sandblasting.
SANDBLASTING
This form of abrasive blasting is typically used to clean rugged surfaces like stone walls and the hulls of boats. This technique propels sand against the surface at high pressure to smooth away rough textures, modify the shape of the object being blasted, and remove surface contaminants.
Dry ice blast cleaning has a number of benefits over sandblasting:
STEAM OR WATER BLASTING
Steam or hot water blasting is a pressure washing technique used for restoration and industrial cleaning jobs. In theory, the steam is propelled from the hose at pressures up to 5,000 psi so that oil, grease, and other residue can be cleaned from the surface of equipment without damaging the substrate.
SOLVENT CLEANING
This technique is very conventional, using all manner of cleaning solvents and a bit of elbow grease to remove contaminants.
Though newer is not always better, when it comes to Steamatic’s dry ice blast cleaning technique, it is! Our innovative dry ice cleaning outperforms every other method on the market, giving you a thorough, fast, and efficient clean without any of the smells, hazards, or time-consuming steps required with other options. Call 1-888-767-7616 today to learn more!
 Prevent, Identify, and Treat Mold with Steamatic Services
Steamatic has been helping Canadians breathe easy with mold-free households for over 40 years, and our team has put together the following primer to help readers prevent, identify, and response to mold in the home.
What are the potential risks of mold growth in the household?
We spend the majority of our time these days indoors. Though we may divide our days between consuming careers and vibrant social lives, we still spend a significant amount of our indoor time at home. When mold is present in the home, you are constantly breathing in bacterial threats and airborne irritants. Indoor mold has been associated witH:
With our unique biological make-up, people respond to the presence of mold in the home in many different ways. The amount of exposure, the severity of the mold, the unique classification of mold spore, and the health status of the resident all affect a person’s individual reaction to mold in the household. Some populations are much more vulnerable to mold in the household, namely, children, the elderly, and those suffering from a weakened immune system as a result of asthma, allergies, or other medical conditions.
What is mold?
Mold is the common name for any fungi that happens to be growing on food or damp surfaces. Mold can come in many different colours, and often looks like a stain or smudge. Mold usually has a musty odor.
Like you, mold needs food and water in order to grow. Mold can subsist off of all manner of residual grime. Once it begins to grow, mold releases spores into the air. These spores are often dangerous when breathed in. The threat of mold is exacerbated by amateur cleaning efforts, as heavy scrubbing only unsettles spores, mobilizing them in the air to be breathed in.
Common areas for mold to grow indoors include window sills, fabrics, carpets, and wall surfaces found in kitchens, bathrooms, and laundry areas. All of these areas are exposed to higher levels of moisture and humidity than other parts of the home.
Common causes of mold-friendly moisture.
Common causes of mold-friendly meals.
Mold can live on all manner of things. Common mold meal-time choices include any kind of organic matters. Basically, if the substance you are wondering about is carbon-based, it will sustain mold growth.
Common hosts for mold around the home
What do I do to get rid of mold?
The most valuable piece of advice you can get about mold removal is to hire on professional assistance. Trying to take care of the problem on your own may seem like a cost-effective option, but you really only risk making things worse. Most homeowners do not have the proper respirators and removal equipment lying around the house. Trying to scrap the mold off without the proper tools will only kick allergens up into the air, putting your lungs at risk and spreading spores around to perpetuate the growth cycle.
Steamatic has been ridding Canadian households of mold for over 40 years. We use an innovative, effective, and environmentally-friendly method of mold removal. To learn more about our mould and mildew removal and remediation process, visit our website or call 1-888-767-7616 today!
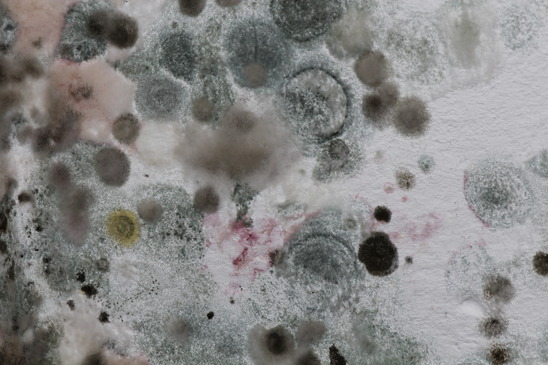 Steamatic’s 6-Step Mold Prevention Program
Steamatic’s mold and mildew removal and remediation service has been keeping Canadian homeowners safe from the effects of toxic mold for over four decades. Our mold-fighting service is truly all-encompassing, able to both treat existing mold and identify problem areas to prevent future growth. Where treatment is needed, we use an innovative and environmentally-friendly dry ice blast cleaning method to eliminate the threat of mold spores and access hard-to-reach areas for a thorough clean. We work with your insurers and arrive on scene fast so that the area can be secured and treated before any additional harm is done. Once the immediate threat is taken care of, we work hard to find the source of the mold-causing moisture, and handle any repairs or renovations that may be needed with a professional touch.
Though our mold and mildew removal and remediation service is available around-the-clock and for an extremely affordable rate, it is always preferable to avoid the problem altogether. As the old saying goes, an ounce of prevention is worth a pound of cure. Keeping this in mind, the Steamatic team would like to offer you a 6-step mold prevention program to help keep harmful spores far from your family home
Ventilate your home as much as possible.
Mold thrives in humid, stagnant air. Both of these conditions can be avoided if proper ventilation is provided. Increasing the quality of ventilation in your home is not very difficult if you use the following simple steps:
Keep your house warm.
Rid your home of any items that could host mold.
Keep your home dry and clean.
Minimize moisture generated by common indoor sources.
Stop water from creeping into your home.
Follow these 6 mold prevention tips and you should be able to drastically reduce your chances of experience mold growth in the home. If you see mold despite your best efforts, call 1-888-767-7616 today for fast, safe, and responsive removal service!
 Restoring Ceilings After Water Damage
Ceiling stains range in colour from light copper to dark brown, and the paint will often bubble up. If there are moisture bubbles, chances are that the paint will continue to chip and crack, if it has not done so already. Acting quickly will reduce the amount of work and damage, so get started now with this simple guide.
NOTE – Expediency is everything!
It is important to ensure that the non-cosmetic damage has been dealt with accordingly. The risk of mould and mildew after a flood is much higher than normal, so make sure to fix all other issues before restoring the look of the ceiling. Restoring the look of the ceiling could help you notice more serious, and dangerous, issues after a flood or other water damage has occurred.
What you will need to get the job done:
Paint. You can colour-match to your old ceiling, or use this restoration effort as an opportunity to coat your home with a new shade.
1) Remove old paint.
The first step is to remove that crackled, bubbled paint that has loosened up from the water damage. Use the wire brush to scrape off loose paint. While you are making your way through this process, it is also a good idea to use the household cleaner in between scrapings. This will help lessen the chance of mold later. One this is done, wait for the surface to be completely dry before proceeding to the next step.
2) Shellac the affected area.
This step is very important, and is often overlooked. Before you put on the primer, add one coat of shellac. Allow it to dry completely, then add another coat. Be consistent with your brush type and the direction of application, as this will make your ceiling look as good as new. Shellac is especially important to use in areas that have been damaged because of water, and will be an essential part of the restoration process.
3) Time to prime.
Make sure you have purchased a reliable, high quality primer for this job! The primer will greatly aid in restoring your ceiling, making it look new, and buying a cheaper, low quality primer will show less results. Apply it as your normally would a primer and, again, allow for complete drying before continuing. Don’t rush this drying process; a little patient now will save you a lot of problems later.
4) Paint, paint, paint!
Now that you have gotten rid of the old paint and applied shellac and primer, you have gotten to the fun part – painting! Make sure that the previous coats have fully and completely dried before continuing to this step. Apply an even coat of the same paint colour as the rest of the ceiling. Apply more than one coat if necessary, still making sure to let the paint fully dry in between applications. If the ceiling has not been painted in a very long time, the restored area might seem lighter than the rest of the ceiling. This will gradually fade over time, and the newly painted area will eventually match the rest of the paint.
